When you’ve spent hours fine-tuning layouts and interactions in Adobe XD, your goal is clear: get that vision into the wild, whether that’s web, mobile, or handoff-ready code.
But moving from .xd to deployable assets or HTML/CSS isn’t plug-and-play. Let’s break it down step by step.
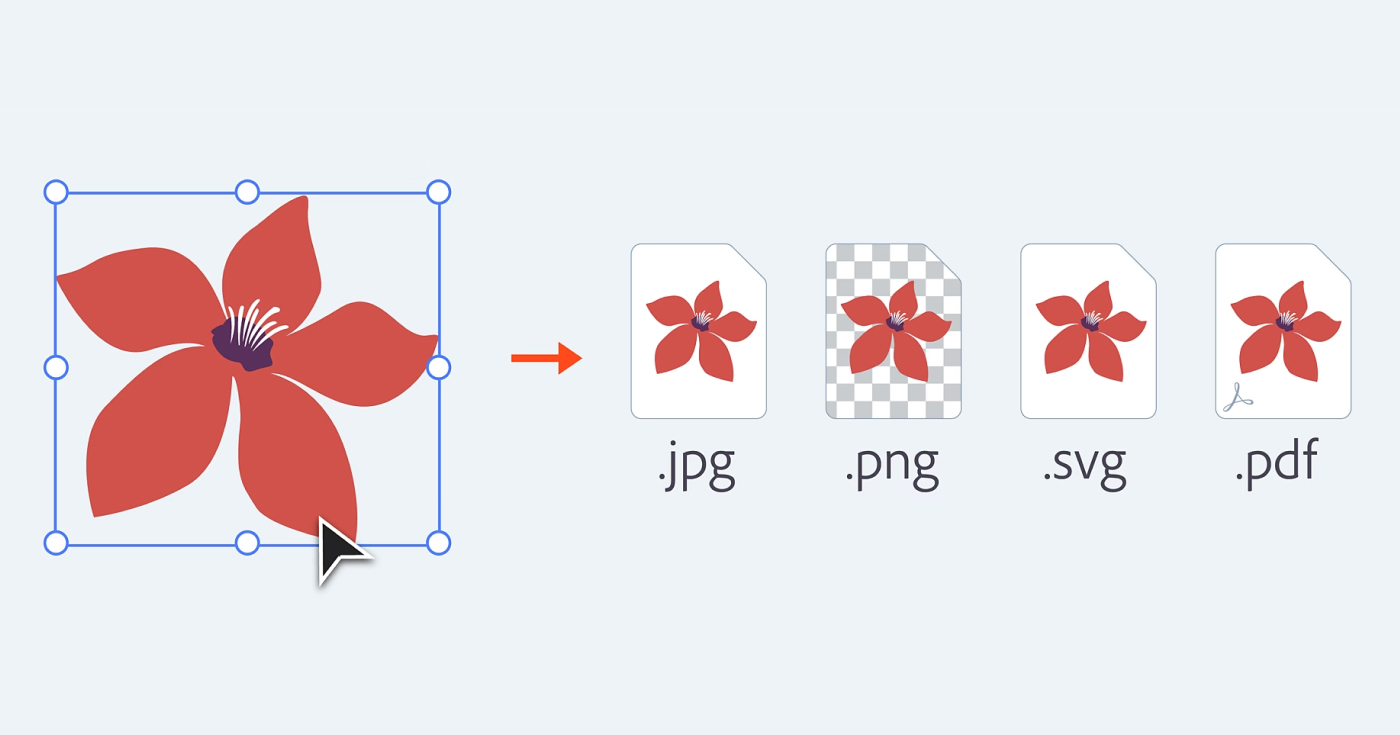
1. Core Exporting Inside Adobe XD
Adobe provides built-in support for exporting design assets:
- Select artboards or layers, right-click and choose Mark for Export.
- Navigate to File > Export (or ⌘E on macOS).
- Choose formats:
- PNG/JPG: Ideal for bitmap graphics; select 1× to 4× scale.
- SVG: Vector-ready, adjustable presentation attributes or embedded assets.
- PDF: For presentations or documentation; export single or multiple files.
Core exports give you production-ready assets optimized for web, iOS, Android, or print.
2. Best Plugins & Tools to Convert XD to HTML/CSS/JS
Exporting raw assets is fine, but if you want code, here are today’s best converters:
Anima
- Enables clickable prototypes in XD, exportable as full production-ready HTML/CSS/JS plus React or Vue.
- Pros: clean semantics, supports interactions, auto-layout, export packages, or per-component code.
- Cons: advanced features require a paid plan.
Locofy
- Built-in XD plugin generating live responsive prototypes and exports HTML/CSS or React/Next.js.
- Pros: interactive, preview in-browser, SEO-friendly metadata, Github-ready.
- Cons: newer tool, potential edge cases.
Web Export
- Community-supported plugin extracting basic HTML & CSS.
- Pros: free and straightforward.
- Cons: limited styling and layout options.
Export Kit
- Converts XD files to full HTML/CSS environment support, dynamic content options.
- Pros: multiple-page export, dynamic elements.
- Cons: customization depth can vary, manual cleanup sometimes required.
App Builder (Indigo.Design)
- Adobe XD plugin geared toward enterprise-grade output with Angular, React, or Blazor code.
- Pros: framework-specific, scalable.
- Cons: requires UI-kit usage, likely paid plan.
Professional Services (PixelPerfectHTML)
- Specialized professional conversion services with CMS-ready outputs.
- Ideal if you lack coding resources or time.
3. Choosing the Right Converter
| Scenario | Recommended Tool | Why |
|---|---|---|
| Clean HTML/CSS basic layouts | Anima or Locofy | Strong auto-layout, interactions, clean code |
| Quick and free | Web Export | Minimal setup, direct export |
| Multi-page and dynamic elements | Export Kit | Supports complex exports |
| Enterprise scalable code | App Builder | Framework-optimized, reusable UI |
| Outsourcing | PixelPerfectHTML | Reliable human-driven handoff |
4. Workflow: From XD to Live Code
- Design intentionally: Mark layers, create components and artboards.
- Export core assets: Bitmap and vector files via built-in XD workflows.
- Install plugin: Use Anima or Locofy inside XD.
- Tag for export: Define containers, links, interactions.
- Preview and adjust: Inspect layouts in-browser to ensure fidelity.
- Export Code:
- Download package (Anima, Locofy).
- Choose HTML/CSS or framework output.
- Developer handoff: Polish code, add CMS, integrate backend.
- Deploy: Static host or collaborate with developers.
5. Tips & Pitfalls to Avoid
- Vector vs bitmap: Use SVG for icons; PNG/JPG for photos or textures.
- Interaction support: Some plugins may not fully capture prototypes or animations.
- Check exported code: Cleanup might be needed for responsiveness, semantics, accessibility.
- Be aware of pricing models: Advanced features might be subscription-based or limited.
Final Thoughts
Use XD’s native exports for static assets, plugins like Anima or Locofy for HTML/CSS, and Export Kit or App Builder for more complex or framework-specific needs. If coding resources are scarce, consider outsourcing with PixelPerfectHTML.
Optimize your workflow by designing clearly, tagging elements early, and previewing regularly to ensure smooth transitions from design to production-ready code.
